Tips From A Food Stylist
Philly-based writer, food stylist, and current WHC student answers your pressing questions about food photography.
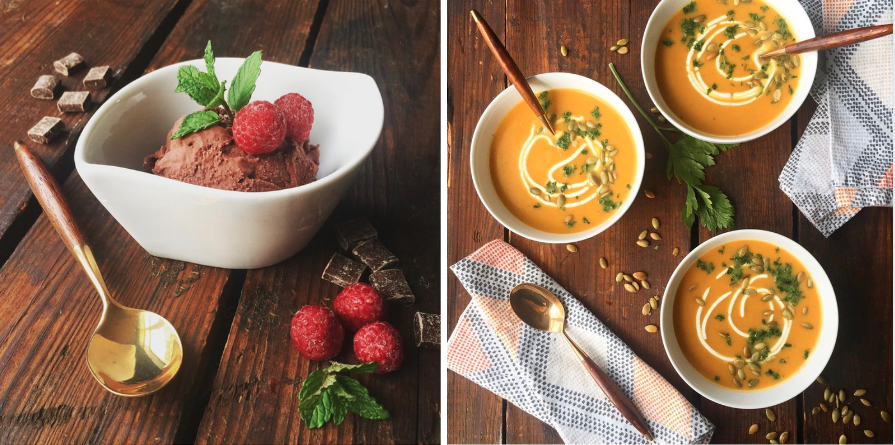
Taking photos of your food seems easy enough, right? You point your fancy phone and snap away, sometimes, you even use fancy filters. But, do your photos look like the ones shown above? My guess is that you’ve used every filter available, but still can’t get that perfect photo. We’re here to help!
I’ve teamed up with Lisa Hecht, a Philly-based writer, food stylist, and current Walnut Hill College Culinary student, to answer some basic questions regarding the fundamentals of composition, lighting, prop selection, and what you can do to get your photos to look like they came from the pages of Bon Appétit magazine.
( All photo credit to Lisa Hecht who we featured in last week’s Feel-Good Friday Newsletter)
What are the best props to use for food styling? Give us your TOP 5:
Props are an essential part of food styling, they need to elevate and complement the food you are shooting. The props that I use for photoshoots aren’t necessarily things that I use in my kitchen every day.
To start you need a background to shoot on. Most of us might take photographs on our kitchen counters or at the table we are eating at, but space and lighting can be a big issue in this scenario. Ideally, you want a surface that can be moved around like a cutting board or a piece of marble.
At Replica Surfaces, they sell boards that mimic surfaces like wood, tile, and stone that can be used as backdrops. Until you are ready to make this investment, I would just look for things you have around the house. Currently, these are my favorite props to use for food styling.
My TOP 5 Food Styling Props:
- An old wooden crate that I found at a flea market
- Walnut cutting board
- Dish towels – different colors, patterns, and textures
- Vintage flatware, including my set of wood and brass cutlery
- Small plates and bowls with simple designs and shapes
Why are “composition” and “framing” so important?
How to compose a great photograph is extremely important because it tells the viewer what to focus on in the image. Keep in mind that your subject does not always have to been in the center of your frame. You might spend a lot of time styling your shoot, but you still need to consider what angle you want to shoot from. Some things to consider when composing a photograph are how the viewers eyes are going to move around the image.
To start you want to have a contrast between the subject and the background. Also think about pattern, symmetry, and repetition. Consider how diagonal or directional lines can lead you into the picture and how framing devices such as trays or plates can help outline your subject. Most importantly, spend time looking at other people’s photographs and try to mimic what they do. Pinterest is a great source for professional food photography.
What’s the best lighting to use for that perfect photo?
Without a doubt, natural light is the best light for food photography. I try to do most of my shoots by the window in my living room where I have a nice stream of natural light coming through. When I shoot in places like my kitchen or dining room, the overhead lights often create a glare or strong reflections on the food and props which I don’t like.
Filters – Yes or No?
If shooting with your phone, then absolutely yes! You should always edit the photos you take. This might mean using the contrast and brightness tools on your phone or using one of the built-in filters. Consider if you want the image to look warm or cool. Do you want the color in the image to be highly saturated or naturalistic? Find the aesthetic that works for you.
Does the equipment matter?
Yes, it does. Ideally, if you plan to go into this profession, you will be shooting with a DSLR camera with a 50 mm lens and probably have a macro lens for close-up shots. If you are shooting with your smartphone, then the quality of your phone still matters. I’m currently shooting with an Apple iPhone 6 Plus but when I see images being shot with an iPhone 11, I can see the difference in quality right away.
Best Apps for photo editing?
Most professional photographers I know use Adobe Photoshop and Adobe Lightroom to edit their photos.
Is all food photogenic or are there some foods to avoid?
Not all food is photogenic but there are always ways that you can make it look better. Think about if you had to photograph a bowl of oatmeal. It is mushy, has little contrast, and looks bland. However, if you topped it with fresh berries, chopped nuts, maple syrup, and sprinkled cinnamon on top, then that boring bowl of oatmeal just became a lot more appetizing. Adding garnishes is a way to add color and texture to what could possibly be an unappealing dish.
Should I have a separate account for my food photography?
If you plan to use your Instagram account as a portfolio for your food photography, then having a separate account will depend on what kind of photos you normally like to post. I currently use my personal account to post all my food photos. This means that if I apply for a food styling job, I feel comfortable sharing my handle with a future employer. However, if my page focused more on images of my personal life and family, then I would absolutely have a separate account.
So, there you have it folks – real advice from a real-world food stylist. Do yourselves a favor and check out Lisa’s Instagram account where she shares some truly inspiring food photography.
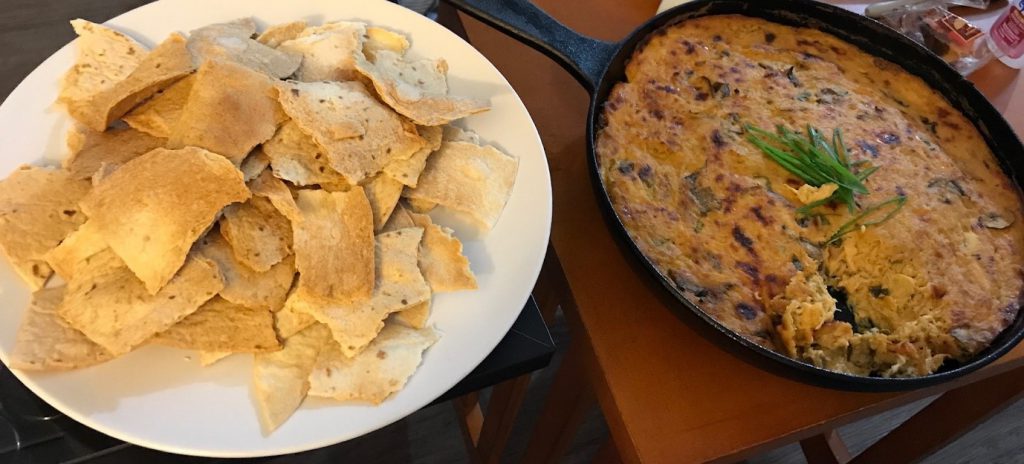 Barbeque Chicken Dip Ready for Game Day Action!
 Steven Walsh
 Meghan Young
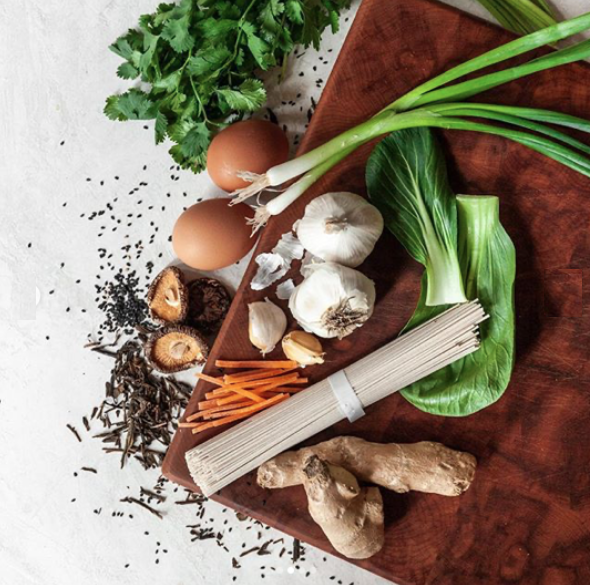
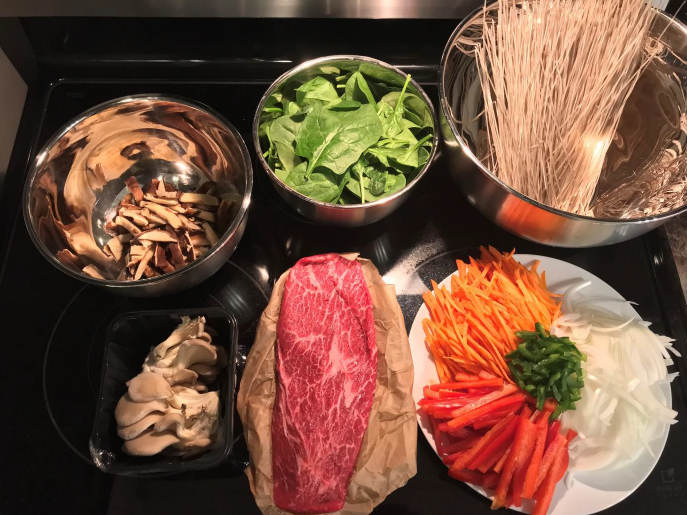 Japchae ingredients
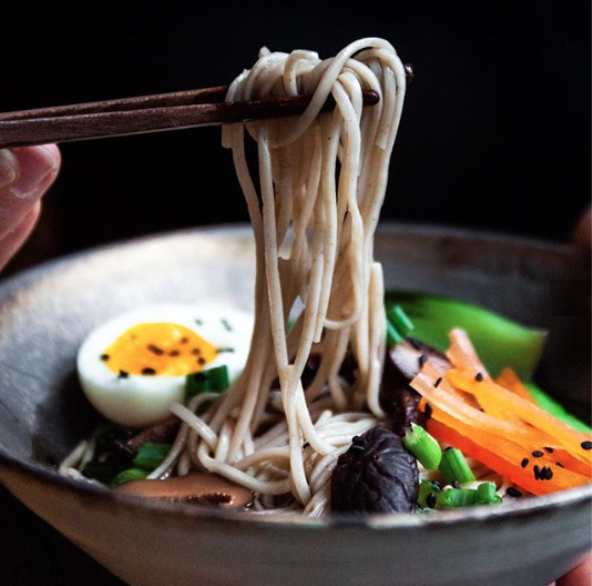
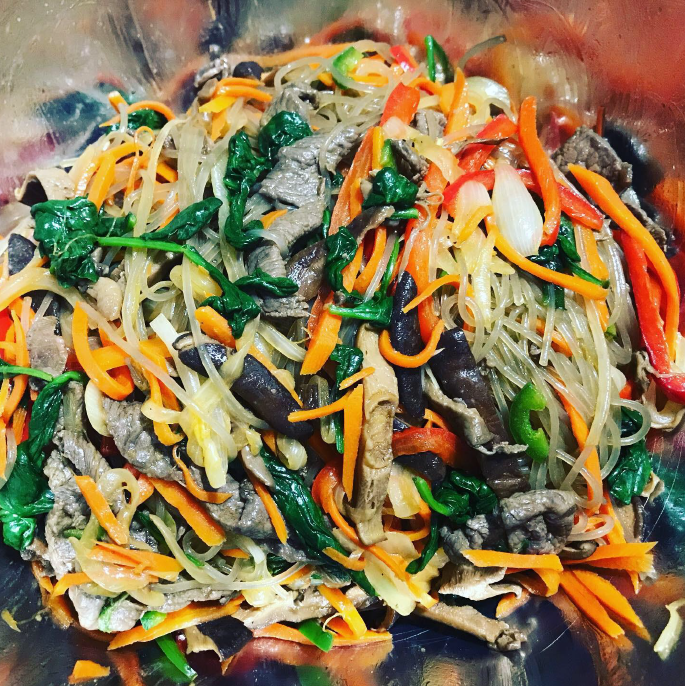 A delicious stir-fry dinner ready to eat!